Get more out of automation with ChatGPT, a leading AI model that replaces routine tasks with efficient processes.
To make ChatGPT work for you, it needs to know your business details and the tasks you want it to perform. The more details you share, the better it can help you.
At Neuledge, we've created a simple and free tool to help you share this information with ChatGPT. You just need to create a context file and upload it for ChatGPT to understand better what you want from it. Let's get started!
STEP 1: Share your information
First, we need your business details. You can share these through different files and website URLs that you use in your business.
💻 To make things easier for you, we recommend using a desktop computer.
Visit 👉 neuledge.com/tools/custom-gpt to begin.
Sharing files
Start by uploading your PDF or Word documents, or text files:
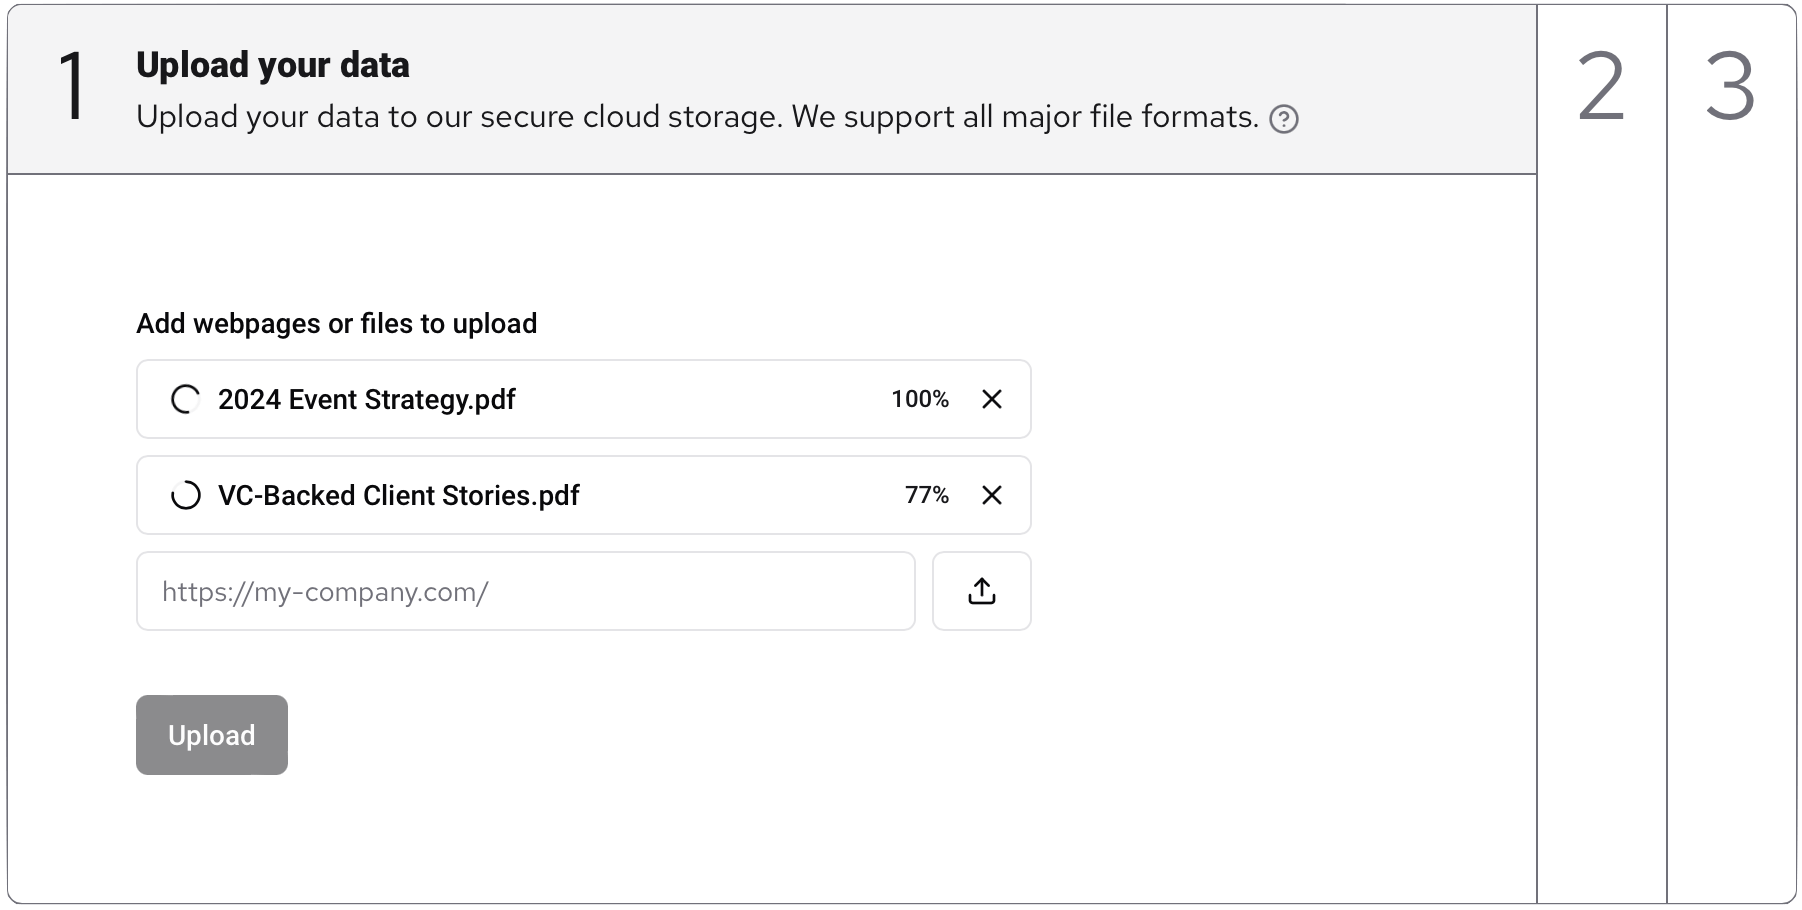
If you have files in a different format, let us know, and we'll see if we can support that too.
Sharing website content
If you have a website or public online resources, share the URL by clicking the “Plus” button. Our tool will go through your website and add all its details into the context file:
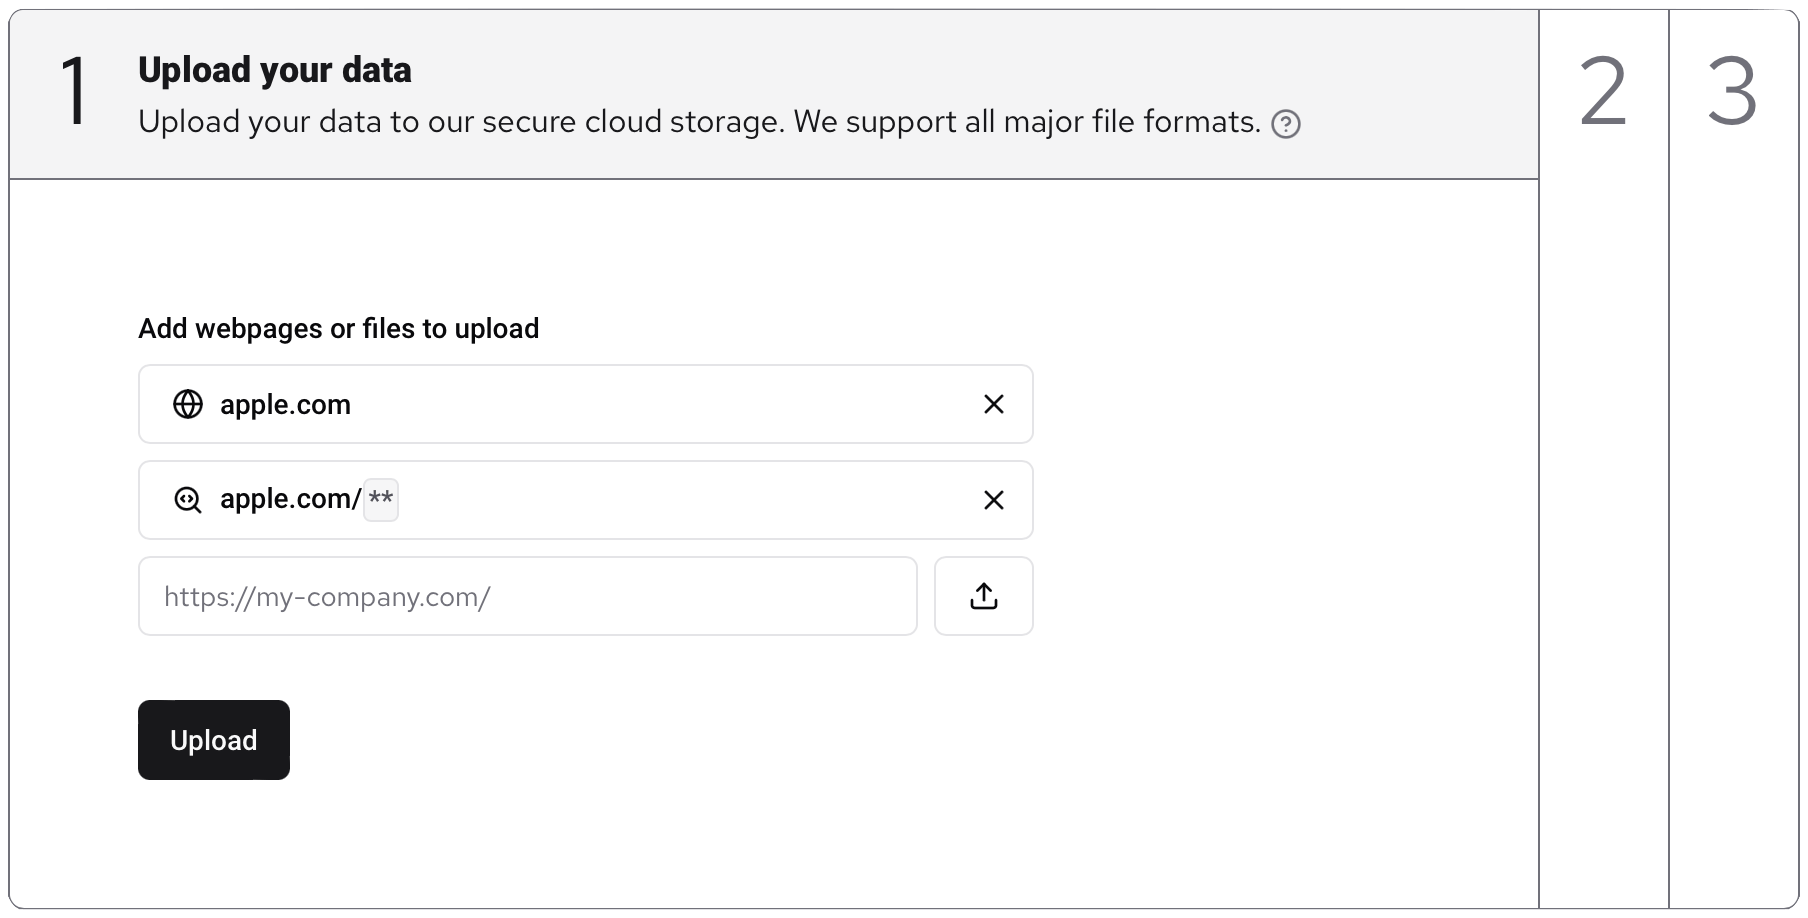
Please note, we can only scan websites with fewer than 50 pages. If your website is larger than this, specify the pages you want us to read.
If you're having difficulty sharing only certain pages, let us know. We're here to help.
STEP 2: Check Your data
Click "Upload" and wait for the tool to process your data. If we cannot use some of the information, those items will be highlighted in red. Simply remove these and proceed.
Check the content of the files
After processing your data, you will move to the next step:
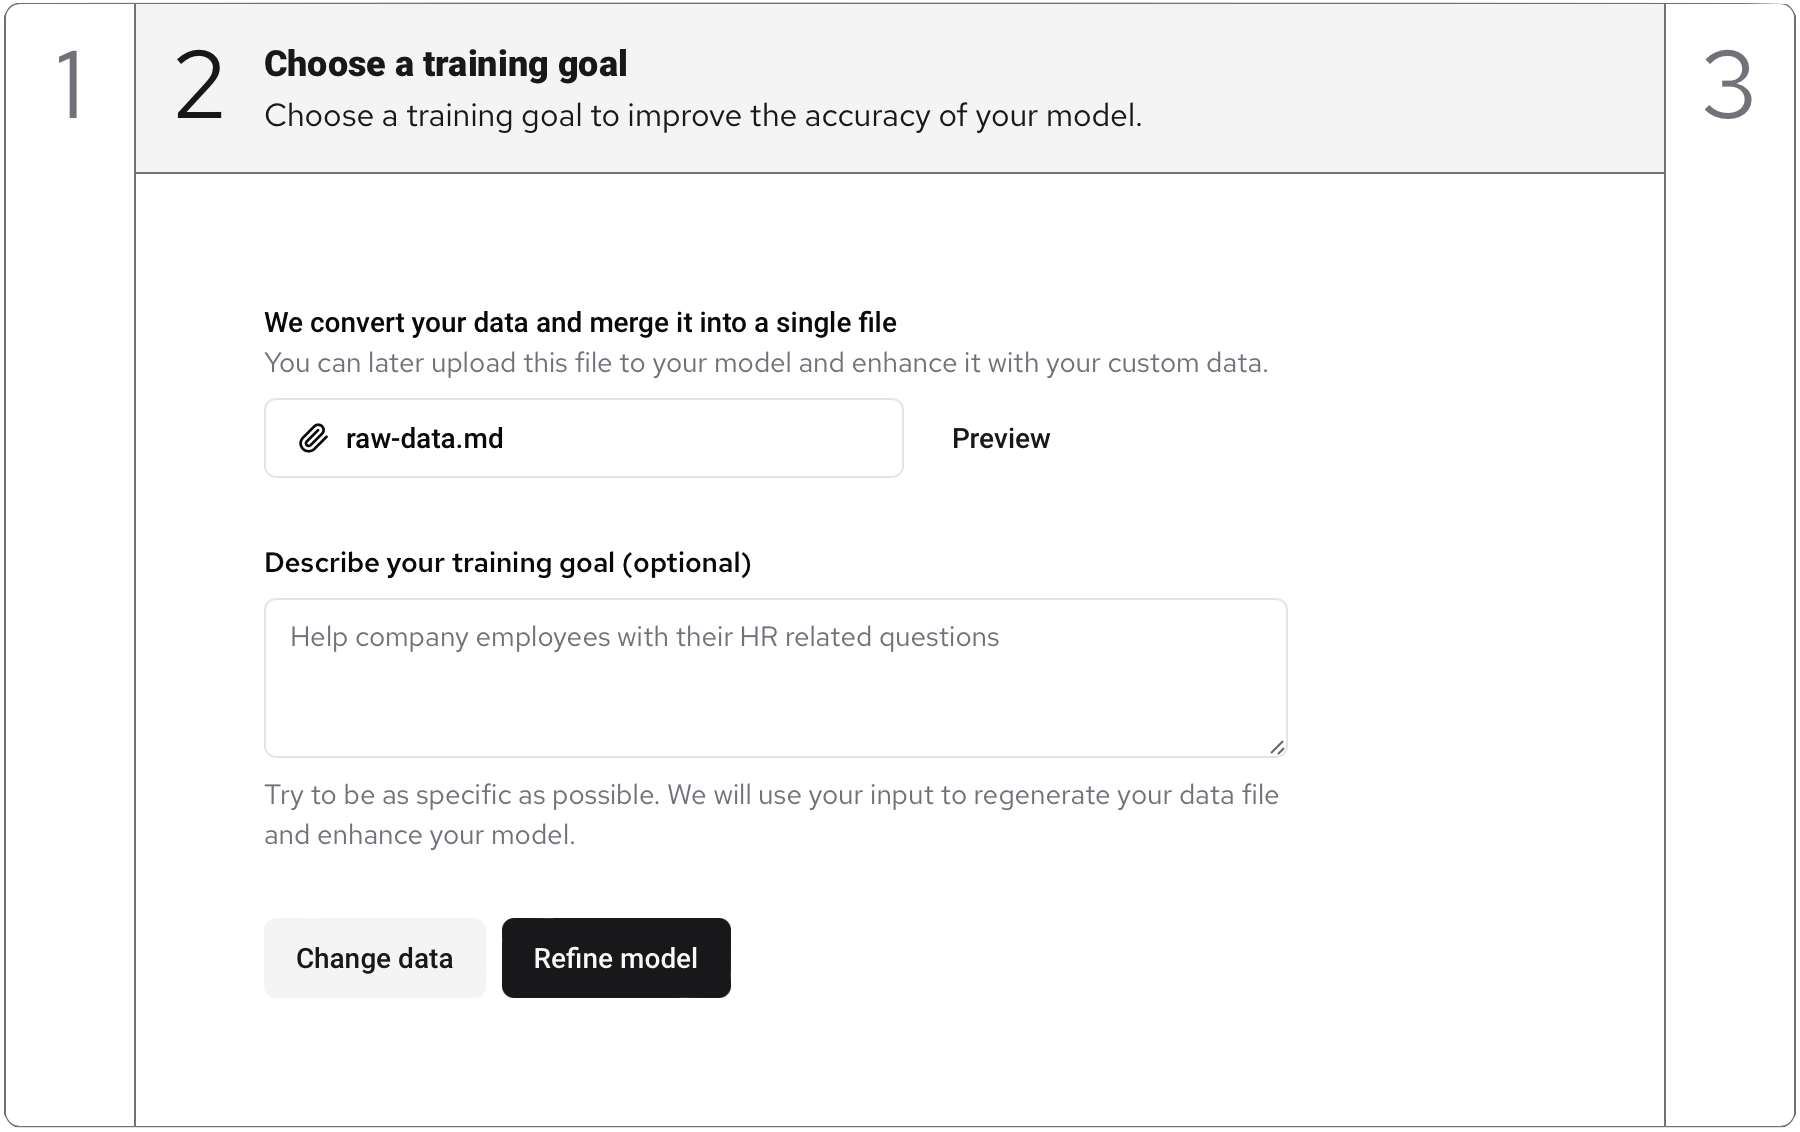
To ensure that we have everything we need, click on "Preview". This will show you what the AI model sees. If anything is not clear in the preview, don't worry. We only need the information to be correct.
If you notice something missing or needs tweaking, let us know, and we will do our best to help. If you're uploading a PDF, make sure the PDF is text-based.
Define your goal
Finally, tell us what you want to achieve. Simply describe your goal in the textbox, and we'll align your data to this.
When ready, click on "Refine", and our tool will present your final context file.
STEP 3: Use Your Context File
Now that you have your context file ready, download it and use it with ChatGPT:
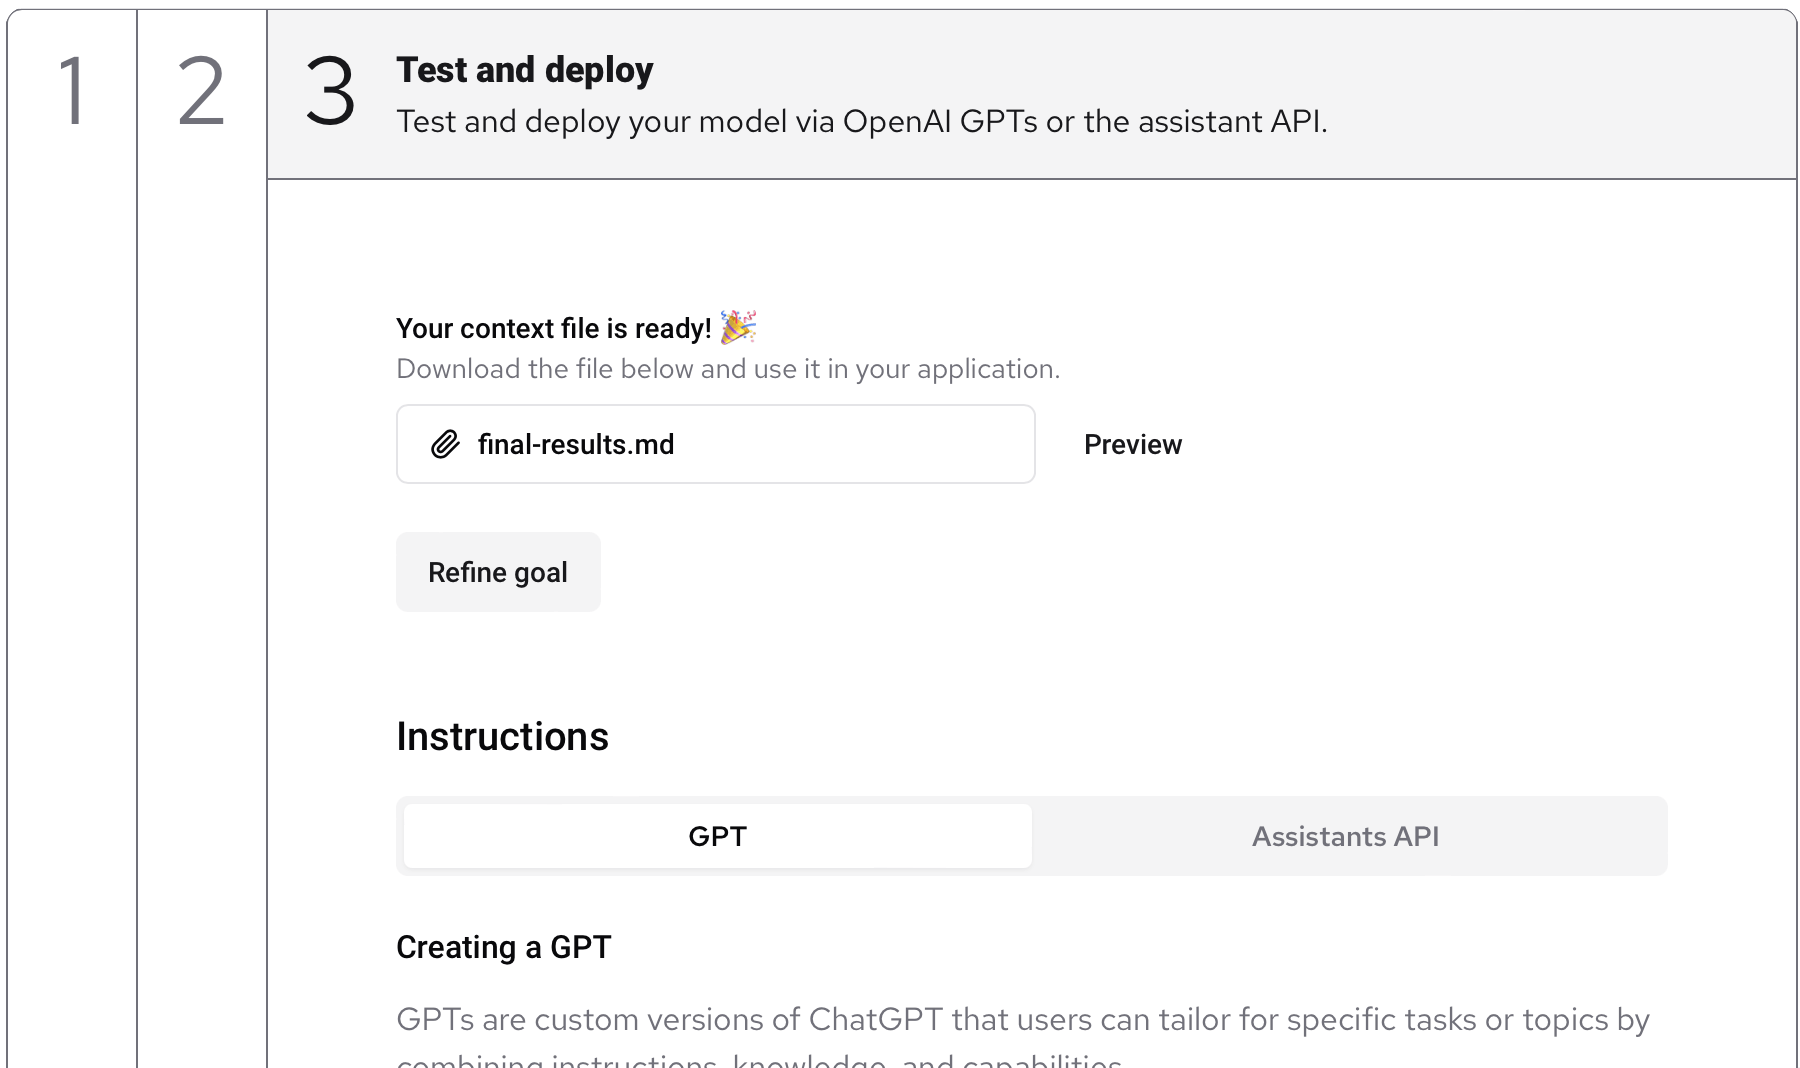
Here's how you can use your context file:
- Upload it directly to ChatGPT chat (Only for Premium users).
- Create a custom GPT at: chat.openai.com/gpts/editor
- Use the Assistant API to create a personalized API endpoint for use with Zapier or Retool.
Test it out and if needed, refine the context file for better results. Feel free to experiment until you get it right.
Wrapping Up
We hope you found this guide helpful. If you want more guides on advanced topics like API integrations and no-code automations, let us know!
Your feedback makes us better, so don't hesitate to share it ❤️
